Archive for category System Administration

Converting from Drupal 5.5 to Wordpress 2.7.1

I finally decided to go ahead with the conversion from Drupal to Wordpress. I don’ thave anything against Drupal, it just didn’t work for me.

Luckily for me my site wasn’t that big so I could do things like categories, tags and slugs manually. All I wanted to copy across were the actual articles and the comments.

I used parts of the SQL script that Dave Dash, D’Arcy Norman and Mike Smullin worked on and  made a few changes to suit my needs.

To convert the posts had to modify the script a bit because all my nodes in Drupal were of type story, not pages or posts, so I simply removed the where to clause.

# Use the Drupal database
use andremiller_drupal;
# Remove all current posts from Wordpress
TRUNCATE TABLE andremiller_wordpress.wp_posts;
# Insert posts from Drupal into Wordpress
INSERT INTO andremiller_wordpress.wp_posts (id, post_date, post_content, post_title, post_excerpt, post_name, post_modified, post_type, `post_status`)
SELECT DISTINCT
n.nid `id`,
FROM_UNIXTIME(n.created) `post_date`,
r.body `post_content`,
n.title `post_title`,
r.teaser `post_excerpt`,
IF(SUBSTR(a.dst, 11, 1) = '/', SUBSTR(a.dst, 12), a.dst) `post_name`,
FROM_UNIXTIME(n.changed) `post_modified`,
'post' `post_type`,
IF(n.status = 1, 'publish', 'private') `post_status`
FROM node n
INNER JOIN node_revisions r
USING(vid)
LEFT OUTER JOIN url_alias a
ON a.src = CONCAT('node/', n.nid)
;

That takes care of the posts. Comments are next.

On my drupal site the email address was not compulsory, so some comments did not have this field filled in. I made a small change here to generate a fake email if none was provided by concatenating the name and hostname of the poster together.

The threading option also didn’t work for me, but wasn’t too important, so I just made that a ‘0′ to indicate no threading. In Drupal I was not using the approval feature, so the status of all my comments was set to ‘0′. In Wordpress that meant they all came in as unapproved. I updated the SQL so all the comments would be imported as approved.

 TRUNCATE TABLE andremiller_wordpress.wp_comments;
INSERT INTO andremiller_wordpress.wp_comments (comment_post_ID, comment_date, comment_date_gmt, comment_content, comment_parent, comment_author, comment_author_email, comment_author_url, comment_author_ip, comment_approved)
SELECT
nid,
FROM_UNIXTIME(timestamp),
comment,
0,
name,
IF(mail='', CONCAT(REPLACE(LOWER(name),' ', ''), '@', hostname, '.localhost'), mail),
homepage,
hostname,
1
FROM comments;
# update comments count on wp_posts table
UPDATE andremiller_wordpress.wp_posts SET comment_count = (SELECT COUNT(comment_post_id) FROM andremiller_wordpress.wp_comments WHERE andremiller_wordpress.wp_posts.id = andremiller_wordpress.wp_comments.comment_post_id);

In Drupal my urls of the posts where /content/slug_name, and I wanted to keep those the same so any links from outside would stay the same.

To do this I updated the Wordpress Permalink settings:

Custom Structure : /content/%postname%

And then made sure the slugname of each post matched the url alias of the article in Drupal.

However, this change made the tags and category urls end up to be /content/tag/<tagname> which I didn’t want. Changing them to the following fixed that up:

Category base: category
Tag base: tag

Now an article can be reached by /content/slug_name, and list of articles with a particle tag by /tag/tag_name.

So far, everything seems to be working just fine.

  • Share/Bookmark

, , , ,

1 Comment

Mounting a hard disk image including partitions using Linux

A while ago I thought it would be a good idea to make a backup of my Linux server by just dumping the complete disk to a file. In retrospect, it would have been much easier had I just dumped the individual filesystems.

When I finally got around to using this backup, long after the 10GB disk had perished I realized that to use the loopback device to mount a filesystem it actually needs a filesystem to mount. What I had was a disk image, including partition table and individual partitions. To further complicate matters the data partition was also not the first partition inside this image.

For reference, I created this image using the Unix ‘dd’ tool:

# dd if=/dev/had of=hda.img
30544113+0 records in
30544113+0 records out
# ls -lh
-rw-r--r-- 1 root    root  9.6G 2008-01-22 14:12 hda.img

I followed the instructions on http://www.trekweb.com/~jasonb/articles/linux_loopback.html to try and mount the partitions inside the disk image, but ran into two problems.

To mount a partition inside the disk image you need to calculate the offset of where the partition starts. You can use fdisk to show this information to you, but you need to specify the number of cylinders if you are using a disk image.

You then also need to multiply the start and end numbers with the calculated sectors to get a byte offset.

I found another tool more useful for this task, called parted. If you are using Ubuntu, you can install it with ‘apt-get install parted’

# parted hda.img
GNU Parted 1.7.1
Using /data/rabbit/disk_image/test2
Welcome to GNU Parted! Type 'help' to view a list of commands.
(parted) unit
Unit?  [compact]? B
(parted) print
Disk /data/rabbit/disk_image/test2: 10262568959B
Sector size (logical/physical): 512B/512B
Partition Table: msdos
Number  Start        End           Size         Type     File system  Flags
1      32256B       106928639B    106896384B   primary  ext3         boot
2      106928640B   1184440319B   1077511680B  primary  linux-swap
3      1184440320B  10256924159B  9072483840B  primary  ext3
(parted) quit

Now we have the offsets and we can use those to mount the filesystems using the loopback device:

#mount -o loop,ro,offset=32256 hda.img /mnt/rabbit

That mounted the first partition, the ‘boot’ partition, but this didn’t have the data on it that I was looking for. Lets try to mount partition number 3.

#umount /mnt/rabbit
#mount -o loop,ro,offset=1184440320 test2 /mnt/rabbit
#mount: wrong fs type, bad option, bad superblock on /dev/loop0,
missing codepage or helper program, or other error
In some cases useful info is found in syslog - try
dmesg | tail  or so

Oops, that doesn’t look right. According the article referred to above if you are using a util-linux below v2.12b then you cannot specify an offset higher than 32bits. I’m using util-inux 2.13 which shouldn’t have that problem, and besides, my offset is well below the 32bit limit.

The article also offers an alternative loopback implementation that supports mounting partitions within an image, but that requires patching and recompiling your kernel which I would rather not do.

Instead I decided to extra ct the filesystem from the image which would then allow me to mount it without specifying an offset.
Doing this is quite straightforward with ‘dd’. You need to give ‘dd’ a skip count, or, how far into the source to start copying, and a count, how much to copy.
Here you can either use the single byte offsets retrieved with parted or divide them by 512 and let ‘dd’ use 512 byte blocks. Copying just one byte at a time takes a very long time, so I suggest using a larger block size.

Here is the command I used to extract my filesystem. Skip is 2313360 (1184440320/512) and Count is 17719695 (9072483840/4)

#dd if=hda.img of=hda3.img bs=512 skip=2313360 count=17719695
17719695+0 records in
17719695+0 records out
9072483840 bytes (9.1 GB) copied, 485.679 seconds, 18.7 MB/s

After extracting the filesystem I was able to mount it without any problems.

# mount -o loop hda3.img /mnt/rabbit/
# df -h /mnt/rabbit
Filesystem            Size  Used Avail Use% Mounted on
/data/rabbit/image/hda3.img
8.4G  6.3G  1.7G  80% /mnt/rabbit
  • Share/Bookmark

, , ,

21 Comments

Recovering reserved space in ext2 and ext3 filesystems

When using the ext2 or ext3 filesystem by default 5% of the available blocks is reserved for use by the root user. This allows the system to continue running if non-root users fill up the file system and also assists in preventing file fragmentation because the filesystem does not fill up completely.

Under certain circumstances this extra protection is not required or desired. For example, I have a 1TB ext3 array specifically to store media on seperate from my operating system and other file systems. The root user will never write to this file system so reserving 5% (50GB) is wasted space.

To recover this space you can use the tune2fs command and specify the -m 0 option. Here is an example.

Before the tune with the default 5% reserve:

root@pooh:/data# df -h /data
Filesystem            Size  Used Avail Use% Mounted on
/dev/mapper/data_vol_grp-data_vol
921G  867G  7.2G 100% /data

The tune2fs command to adjust the reserved percentage to 0.

root@pooh:/data# tune2fs -m 0 /dev/data_vol_grp/data_vol

The available space after adjusting the reserved space.

root@pooh:/data# df -h /data
Filesystem            Size  Used Avail Use% Mounted on
/dev/mapper/data_vol_grp-data_vol
921G  867G   54G  95% /data
  • Share/Bookmark

, ,

3 Comments

Starting Microsoft Outlook 2007 on Acer Vista system gives MSVCR80.dll was not found error

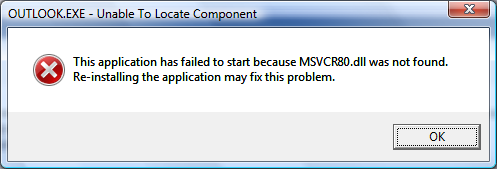
On a recent Acer laptop (TravelMate 5620) running Vista I installed Microsoft Office 2007 and Outlook worked the first time, but after opening it a second time it gave me an error message, saying that “This application has failed to start because MSVCR80.dll was not found. Re-installing the application may fix this problem.” After numerous attempts to restart Office I either received this error message or it tried to re-install itself.

Turns out the problem is caused by the Acer eDataSecurity Outlook Add-in which is installed automatically on your new Acer system. This Add-in is not compatible with Microsoft Office 2007 so you either need to uninstall Acer eDataSecurity from the Windows Control Panel or disable the Add-in.

I opted for disabling the Add-in as I used other features of Acer eDataSecurity. The catch was that to disable the Add-in using conventional means you need to do it from within Outlook, but Outlook won’t start with this Add-in enabled! To get around this I used a registry editor to disable it.

Open your registry editor by running “regedt32″ and browse to Computer\HKEY_LOCAL_MACHINE\SOFTWARE\Microsoft\Office\Outlook\Addins\OAddin.Addin

Then change the value of the LoadBehaviour key and change it to 0. This will disable the Add-in.

But, Outlook still won’t start! The problem is that the Add-in has already done its damage to Outlook and by disabling it all we’ve done is prevent it from corrupting Outlook the next time it runs.

What the Add-in did was modify or remove the “outlook.exe.manifest” file from the Microsoft Office installation directory (by default, this is C:\Program Files\Microsoft Office\Office12). This file is hidden, if you would like to see it in the directory listing, enable viewing of hidden files (Tools->Folder Options->View Tab->Files and Folders->Hidden files and folders->Show hidden files and folders)

We need to repair that file before Outlook will start and Microsoft has provided us with a tool to do this, installed as part of Office 2007. Go to your Start Menu, All Programs -> Microsoft Office -> Microsoft Office Tools -> Microsoft Office Diagnostics.

Let Microsoft Office Diagnostics finish its run and it should mention under Setup Diagnostic that it repaired all Microsoft Office installation problems it could find.

Office 2007 should now start.

  • Share/Bookmark

, , ,

69 Comments

Getting Midnight Commander line drawing to work with PuTTY

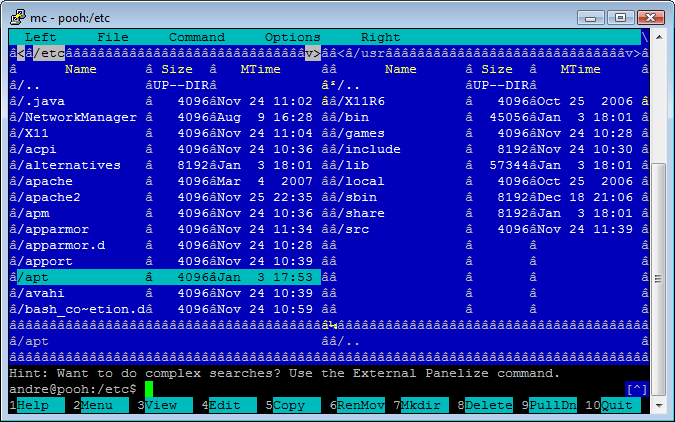
When using Midnight Commander with the default settings of PuTTY connected to my Ubuntu Linux machine the line drawing characters are all messed up.

After some experimentation it turns out that to fix it all you have to do is change your character set in PuTTY to UTF-8 and the problem is fixed. To do this open up the PuTTY settings and go to Window->Translation->Received data assumed to be in which character set: and change it to UTF-8.

After making this change you might have to force a redraw of the mc screen to show the new line drawing characters:

Also not that some fonts might not have the line drawing characters available. The fonts I know work is Courier New and Lucida Console. To change your font go to Window->Appearance, Font settings and click the Change button.

For reference, I was using using Midnight Commander 4.6.1 running on Ubuntu 7.10 and using PuTTY 0.59

  • Share/Bookmark

, ,

30 Comments